
How To Find A Stud in a Finished Wall
Need to hang a heavy picture or mount a shelf? Nailing or screwing your hanger into a wall stud will give you the best support, but how do you find one of those stealthy little buggers? Sometimes it seems like they are hidden on purpose! But what do you do when the wall is finished? Can you still find the studs? The answer is yes, but it takes a little bit of work. Keep reading for tips on how to locate wood studs in a finished wall.
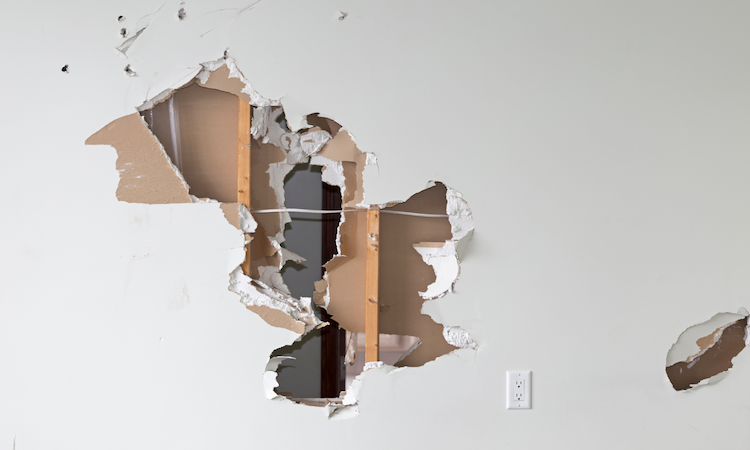
What Are Wood Studs?
Let’s start with the basics so you know what’s going on behind those walls. The standard frame methods used in the construction of most homes today are nearly universal. Wooden studs measuring 2×4 or 2×6 are placed at 16-inch intervals to create the walls. This means that the distance between the centers of any two studs is only 16 inches. It’s common to see 2×8, 2×10, or 2×12 timber in ceiling construction, with either 16 or 24-inch spacing depending on the design. Assuming your home’s roof was constructed using trusses, the typical truss spacing is 24 inches. If you are unsure, you should go into your attic and measure the distance between the joists there.
Plumbers, electricians, sheet-rockers, and everyone else who worked on your house during construction all left behind hints that will lead you directly to the studs.
Popular Ways to Find Studs
Here’s how you can find those clues using popular methods.
- One way is to use a small, strong magnet. Place the magnet on the wall and move it around until you feel it attached to something behind the wall. This will be the location of a metal screw or nail that is holding the stud in place.
- Darken the room you’re working in and shine a flashlight across the wall. This will highlight imperfections in the wall, including nails that are popping through the drywall and tape joints where the drywall was butted together.
- Another method is to measure 16 inches from the corner of the wall and knock on the wall. If it sounds solid, there is likely a stud behind it.
- Remove the outlet cover. If the electrical box is plastic, then one side of it has two little spacer nubs that the electrician uses when nailing the box to the stud. The stud will be on the same side as the two nubs, and the center of the stud is 3/4 inch from the side of the box. If you have older electrical boxes without spacers, then tap a small nail at an angle away from the edges of the box. The nail will either drive all the way into empty space or it will find solid wood. This same method can be used for locating a stud in your ceiling. Just be sure to cut the power before removing any light fixtures.
- If you have a forced air heating system, you can remove a grate to a cold air return. Quite often, the space between the studs is used as a duct.
- If you are working in the kitchen, look inside the cabinets for the screws holding them to the wall.
- Inspect the baseboard and chair rail moldings for filled nail holes. Look closely. A good painter will not leave much of a trace.
- For stairways, take a look at the handrail. The brackets holding it to the wall are stud locations.
- There’s always the tried-and-true method of tapping your knuckle across the wall until the hollow sound becomes more of a thud. It is not as accurate as the other methods, but it does work.
If Everything Else Fails, Use A Stud Finder
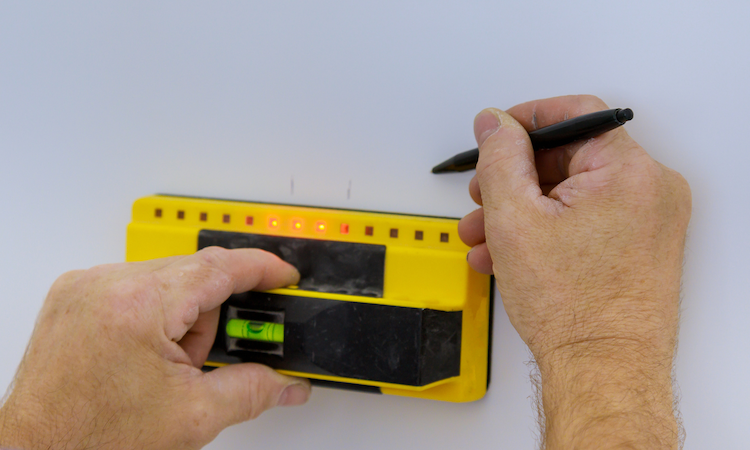
A stud finder is a handy tool that can be used to locate the framing studs in a wall. The first step is to identify the type of wall construction. If the wall is made of plaster, then the studs will be located behind the lath strips. If the wall is made of drywall, then the studs will be located behind the paper facing. Once the type of wall construction has been determined, the next step is to select an appropriate stud finder. An electronic stud finder can be used for plaster walls. A magnetic stud finder can be used for drywall walls. The final step is to position the stud finder against the wall and scan for the edges of the studs. When the edges of the studs are located, they can be marked with a pencil or chalk for future reference.
Where you locate a stud and where you want to mount or hang something can be in two different places. So how do you find the stud location nearest your work area? As mentioned before, the other studs in the wall are 16 inches, or a multiple of, away. Most good tape measures will highlight those numbers to make it even easier. Mark the spot, then use a level to follow the stud vertically up or down the wall to the height you need it.
As a final suggestion, before driving a big nail or screw through the drywall, test your mark with a 4-penny finish nail. The smaller the hole, the easier it is to cover up any goofs. Do a couple of tests by tapping the nail in at an angle in one direction and then again in the other direction. This will ensure you are hitting the center of the stud, giving you the best support.
Conclusion
While a stud finder is a simplest and most accurate way to find wooden studs in a wall, there are a few other methods you can use if you don’t have one on hand. One way is to knock on the wall until you hear a solid sound, indicating that you’ve found the edge of a stud. Another is to shine a flashlight on the wall and look for any shadows left by the studs. Finally, you can run your hand along the wall until you feel the nails that secure the studs to the wall. While these methods may not be as foolproof as using a stud finder, they can still help you locate the studs in a pinch.